Pages

Wednesday, March 30, 2016

MAKE IT MONDAY #244: SCORE LINES

Hi Friends-

This week for "Make It Monday," Laurie Willison  is showing how to include score lines as part of the detail in her cards. What a fun idea-I have not done this before, but it definitely adds a fun detail and is very simple to do!

Here is my take on this weeks MIM challenge-


I scored diagonal lines on the top of my card and added Authentique "Delightful" patterned paper to the bottom of my card. The sentiment is from a newer stamp collection from Papertrey Ink called, "Be." The Butterfly's, "Be Happy" stamp set are also from PTI. I used "New Leaf" ink to stamp the frame around the sentiment. Laurie also shows how she pops small words to give dimension with fun foam-so easy to do and really helps add a "Wow" factor to the sentiment!

This was a very simple and quick card to make and with just a simple score line, adds so much detail-who knew? 

Have a great day-
Heidi

MAKE IT MONDAY #243: INK BLENDING OVER HEAT EMBOSSING

Hi There Blog Friends-

Last week, Papertrey Ink's MIM was to use ink blending over heat emboss. I made a card, but then didn't ever take the time to load here to my blog and enter the challenge. UGH-LIFE and WEATHER! It poured the day I made the card and then I never had time to get my camera out and get a good picture.

Since I took the time to make the card, better late than never (at least to let you see my creation)-oh well! So here was my take on the challenge last week. 


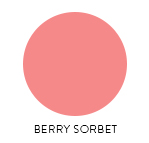
I used the "Polka Dot Basics and Diagonal Additions" stamp sets from PTI and heat embossed the small dots with white. I then stamped bigger dots and the diagonals with "Hawaiian Shores and Mint Julep" inks. I blended "Lemon Tart" ink over the small white embossed dots. The butterfly's are from the "Bitty Butterflies and Signature Series-Butterfly" stamp sets. They are stamped with "Summer Sunrise, Berry Sorbet, and Lemon Tart" inks. The sentiment is also from the "Bitty Butterflies" stamp set.

It was a fun card to make, and I will definitely do some more of this technique in the future!

Have a great day-
Heidi

Sunday, March 13, 2016

Reverse Confetti- Sketch For You To Try (SFYTT) #34

Hi All-

I hope you are all having a great weekend? It is very blustery and wet here in Northern California this weekend, and I have spent some creative time in my craft room, getting inky fingers and challenging myself to try some new techniques!

I decided to use this months Reverse Confetti Blog sketch to create a Spring card, as Bunny Day will be upon us before we know it!

Here is the sketch-

Here is my take on the sketch:


I used Hoppin Dots Quick Card Panel to cut out the green tag, which is a part of the Gift Card Die. This little panel is perfect as the words "Hippity Hop" are written all over it!

I also used "Basket Confetti Cuts," and inside the basket I stamped and die cut a little spring chick and bunnies from the stamp set "Carton Cuties," and at the top of the green tag, I cut out a piece from "In the Bag Cuts and Totes." I also use the banner from "Tag Me" to stamp "Spring has Sprung" also from the Carton Cuties stamp set.

What a fun sketch and I can't wait to give it to someone special this spring!

Happy week-
Heidi

PTI-Make It Monday #242

Hi There-

It is a very wet, windy day here in Northern California-A perfect day to create! 

This week over a Papertrey Ink's blog-"Capture the Moment," Dawn McVey is challenging everyone to use a sponge stamping technique. If you aren't sure what that entails, she has a great video showing the process. What a fun technique this was, and one I hadn't tried before, so it gave some challenge!

Here is a photo of her card using this technique: 

DSC_7364.1

On here card you can see how she variegated the colors on the bird with shades of green and blue.

Here is my finished card:

I used the stamp and die set-"Fresh Floral Wrap Ups."


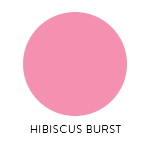
On my card I chose to do this technique on the wrap around the flowers, using Hibiscus Burst and Berry Sorbet and Classic Kraft. On the stems of the twigs in the floral arrangement, I used New Leaf and Classic Kraft. The flowers are Aqua Mist.

Here is a close-up--

It was a fun challenge, and a technique I will use in the future! Make sure you check it out and join in the fun!

Have a great week-
Heidi


Sunday, March 6, 2016

Papertrey Ink-MIM #241

Hi all-

This week over at Papertrey Ink's blog "Capture the Moment," Betsy Veldman is showing a fabulous technique for the Make It Monday Challenge. She is challenging us to make an ombre stenciled background. If you are unfamiliar with how to make an ombre background effect, Betsy has a fabulous video showing how she created this beautiful card---check it out!


 I recently purchased some great background stencils from Papertrey, so I was excited to see this weeks challenge is asking us to use them! I also absolutely love the color combo Betsy chose in making the ombre background, so of course mine is very similar looking, color-wise! 


Betsy used the chevron stencil on her card, and I used the little flat looking oval stencil design from the set for my card. 

For my card details, I use a small doily to put over the background ombre stencil design, and then tied some natural jute twine across this area. I used PTI stamps and dies "Frilly Flowers" with the same color combos as the ombre design.

 I added Ripe Avocado leaves. 

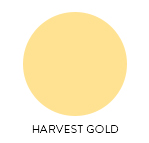
My sentiment is from the stamp set "Handwritten Notes." In the center of the flowers, I die cut a Hibiscus Burst felt flower using the Bitty Button Stacks die. I then added a Harvest Gold button tying the two together with a piece of jute twine.

I love how my card turned out! I have done ombre techniques in other ways before, but using the stencil over the top for some fun tone-on-tone design sure made the colors pop! So much fun!!


Have a Fantastic Day-
Heidi


LinkWithin

Related Posts Plugin for WordPress, Blogger...